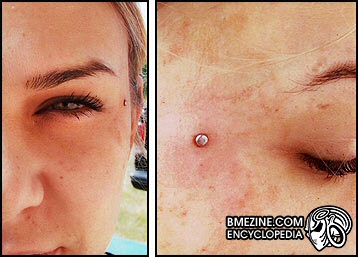
Microdermal
A microdermal or surface anchor has evolved from the techniques used in pocketing, dermal anchoring and transdermal implants. "The idea is to give the aesthetic look of a transdermal implant but with the simplicity and safety of a piercing" (Brian Decker - Pure Body Arts). The simplest way to describe the jewellery is that of a miniaturised transdermal implant, i.e. a flat plate which sits beneath the skin with a single exit for a barbell post giving the visual effect of jewellery (a bead, spike, etc.) that appears to be screwed right into the body.
Contents |
Jewellery
There are a number of similar microdermal jewellery designs currently being made by several manufacturers but they all share some basic design elements. Following the ideas proposed by transdermal implants, the portion of the jewellery which sits beneath the skin has a number of holes to allow tissue to grow through, anchoring the jewellery in place. It is possible that in order to minimise some long term risks this type of jewellery be made of titanium rather than any type of steel. Needless to say making this specialised jewellery requires advanced machining facilities or titanium casting access.
Procedure
The "beauty" of this technique is that it requires no special tools and is minimally invasive compared to an implant procedure. However, it does need some advanced techniques and a pair of steady experienced hands. John Joyce describes the following method:
- I tried a couple with a 10 gauge needle. Everything went fine, but I found I like a 1.5mm dermal punch better since it is very similar to how I do surface piercings (using the “punch-and-taper method”). What I do first is clean the area with Technicare, and then mark where it is going to be. I pinch up the skin where the mark is, and insert the 1.5mm dermal punch straight down into the skin. Once that hole is there, there is no need to use a taper to elevate the skin like you would with a surface piercing — you can just use the leg of the microdermal to separate the tissue for itself. Using a pair of hemostats, I hold the microdermal by the healing nub, and place the long leg of the piece into the hole, lean it back, and pop the short leg into place. The whole procedure is very fast; faster than a surface piercing.
Another advantage of the microdermal techniques is that they are generally no more painful than a regular surface piercing and therefore do not usually require the use of anaesthetics. It is advisable to not place the microdermal in areas where it is likely to be snagged and pulled out, but the client should be advised in any case that this will always be a risk, as well as having to remove them for MRIs, etc.
Healing and Aftercare
Although relatively new, a significant number of microdermals (of various designs) have been successfully inserted and healed. The aftercare advised differs from artist to artist but all include keeping the area clean, dry, and free of irritants. Healing time is 1 - 3 months.
Related Risks
- Inward Travelling Infection
- Deep Microdermal Placement
- Rejection
- Keloids
- Hypertrophic Scarring
- Bruising (temporary usually)
- Implant Rejection


